Saturday, March 31, 2012

It's A Spring Thing!

Spring is beautiful whatever your zip code...Spring in the desert at Casa Copeland is...
The Farmer's market and the first of this year's offering ~ sweet, flavorful strawberries!

 More bounty from the local Farmer's market. Thank you farmers!!!


Fragrant Spanish Broom ~ for me, always reminiscent of Italy, the Locanda del Gallo in Umbria, air thick with the same heady scent.


 Blue Flax! A true desert miracle.


 Lavender ~ another desert surprise, graces us with fragrant flowers in Spring and Fall.

A palette of Marigolds for my planters...easy care and guaranteed color all Spring, Summer and Fall.
What does Spring mean where you live? Wherever this day finds you,  I hope you are getting your Spring thing on! Have a great weekend and Enjoy!

Friday, March 30, 2012

Absorption Pasta

When you are feeling a bit funky what do you crave? Well, first stop, comfort food! During my recent bout of funkiness I wanted something comforting, easy and nourishing to eat. Also, it had to be in my pantry or fridge because that's as far as I was willing to walk. I had a handful of fresh asparagus a half bag of rotini pasta, a lemon, pancetta and some herbs...and a plan. I was craving something as comforting as risotto when I remembered watching Jimmy, the chef at our watercolor retreat in Italy, as he cooked pasta using the same method as risotto...by absorption!
I looked on-line for a recipe for this method and found one using similar ingredients. Here is my version.
Obviously you could substitute other pastas, veggies and add-ins...sky's the limit!  Also, to make it vegan, no cheese or meat...and switch to vegetable stock.


Absorption Rotini with Asparagus, Pancetta, Lemon and Herbs
Serves 2

2 tablespoons  Olive Oil
1/2 lb. good-quality rotini pasta
2 shallots, finely sliced
2 cloves fresh garlic finely chopped
2-3 slices of pancetta, roughly chopped
1/2 bunch asparagus, slightly steamed and cut into 1/4" pieces
1/2 cup grated Parmigiano-Reggiano
Zest of one lemon
3 cups (approximately)  Warm chicken stock
1/2 Tbs each - fresh oregano, rosemary, thyme, finely chopped
Kosher salt and freshly-ground pepper

~Prepare the steamed asparagus, cut and set aside.
~Sauté the pancetta in the olive oil to crisp it up, remove and set aside
~Sauté the shallots, garlic and pasta together in the remaining olive oil until the shallots are soft, careful not to burn...
~Pour in 2.5 or 3 cups of chicken stock and give it a good stir (the pasta should be nearly covered). Bring to a simmer and then reduce the heat to keep it from boiling. Cook for twelve to 15 minutes, depending on the cook time of the pasta you use, stirring occasionally.
~The magic happens as the pasta absorbs the stock and begins to cook. Taste test frequently.  The finished texture will be chewy but cooked.
~When the pasta is finished cooking you should have a nice rich sauce at the bottom of the pan.
~ Add the steamed asparagus and pancetta, heat through.
~Remove pan from heat, add herbs, lemon zest, grated Parmigiano and salt and pepper to taste.
Serve immediately


 Fresh herbs on hand, rosemary, oregano, thyme, mixed with lemon zest and Parmigiano-Reggiano


Add to the pasta off heat, just before serving

This method creates a creamy risotto-like chewy texture and deep flavor
Try it, you'll like it!!

Wednesday, March 28, 2012

Easing my way back in...

This is my way of easing my way back into blogging ; I present to you this gorgeous birdbath full of bluebirds!  I have been under the weather...don't you love that saying? More accurately, I have been under "bad" weather. How many of you out there have fallen victim to the overly zealous flu bug going around?? I will spare you the details but can tell you that by taking the homeopathic remedy oscillococcinum at the first sign of said flu, I cut my down-time in half...and stayed on my feet. I don't believe in taking flu shots, instead I use this flu remedy exclusively. I discovered, what I now affectionately call "Big O",  at a pharmacy on one of our student tours of Europe; I kept seeing large glass bowls of the stuff parked at the checkout registers all over the place. A very friendly English speaking pharmacist explained to me, that it was a flu remedy that Europeans had been using successfully for many years. Back then I could not find it in the U.S. but now you can buy it at WalMart!! I am never without it. Enjoy the birds, it's nice to be back.

Thursday, March 22, 2012

Orange and Brown-Butter Tart Love


Who doesn't love that "creamsicle" combo of oranges and vanilla? Start with a buttery crust, add a creamy vanilla custard, top with sweet/tart oranges add a hint of orange liqueur...and fall  head-over-heels.
If you can find blood oranges (they are in season now!) they add to the drama of this tart and guarantee gasps of delight from your guests! I like to make the tart crust the day before to cut down the workload, but it is all easily completed an afternoon.

Orange and Brown-Butter Tart
by Joanne Weir from fine Cooking

For the tart shell
5 oz. (1-1/4 cups) unbleached all-purpose flour
1 Tbs. granulated sugar
Pinch of table salt
5 oz. (10 Tbs.) cold unsalted butter, cut into small pieces
1 tsp. finely grated orange zest

For the filling
3 Tbs. unsalted butter
2 cups whole milk
3 Tbs. cornstarch
2 large eggs
1/2 cup granulated sugar
Pinch of kosher or table salt
1/4 tsp. pure vanilla extract

For the topping
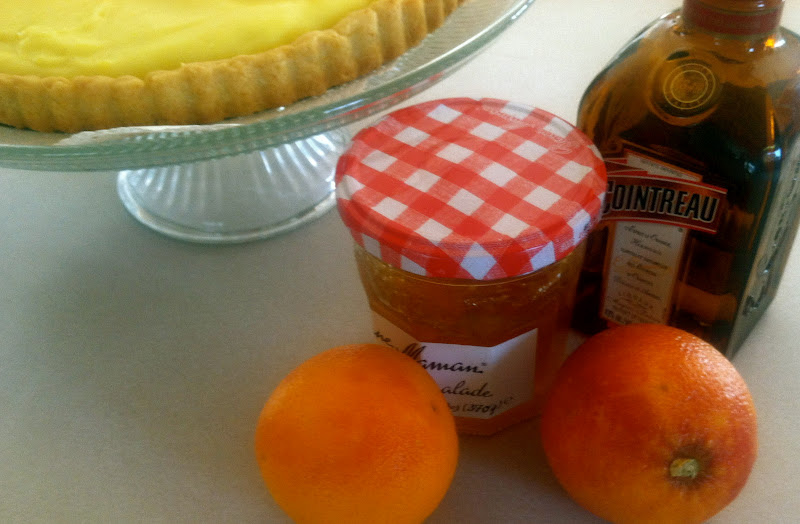
3 large navel or blood oranges, or a combination
1/2 cup orange marmalade
1 Tbs. orange liqueur, such as Cointreau

Make the tart shell
In a food processor, pulse the flour, sugar, and salt a few times to combine. Add the butter
and orange zest and pulse until the mixture resembles cornmeal, six to eight 1-second
pulses. A teaspoon at a time, pulse in up to 1 Tbs. water until the dough just holds together
in clumps. Press the dough together, shape into a 6-inch disk, and wrap in plastic.
Refrigerate for 30 minutes.

Press the dough evenly into the bottom and sides of a 9-1/2-inch fluted tart pan with a
removable bottom—
the dough sides should be 1/4 to 3/8 inch thick. To smooth the bottom,
cover with plastic wrap and press with a flat-bottom measuring cup or glass. (This didn't work for me, so I used my clean hands) Freeze the covered shell for 30 minutes. Meanwhile, position a rack in the center of the oven and heat
the oven to 400°F.
Remove the plastic, line the dough with parchment and fill with dry beans or pie weights.
Bake the tart shell until the top edges are light golden, about 15 minutes. Carefully remove
the parchment and beans, reduce the heat to 375°F, and continue to bake until the shell is
golden all over, about 15 minutes. Cool on a rack.

Don't be tempted to forgo the refrigeration after making the dough and before baking, it is important to a flaky crust

Notice the bottom is uneven? It didn't seem to make a difference.


Below: I love my pie weights!!


Make the filling
In a small saucepan, heat the butter over medium-high heat until it melts and the milk
solids turn brown, swirling the pan occasionally for even browning, about 3 minutes.
Immediately pour into a small heatproof bowl to stop the cooking.
In a medium bowl, whisk 1/4 cup of the milk with the cornstarch. Whisk in the eggs.
In a medium saucepan, bring the remaining 1-3/4 cups milk, the sugar, and salt to a boil
over medium heat. Take the pan off the heat, whisk about 1/4 cup of the hot milk into the
egg mixture, and then whisk the egg mixture into the hot milk.
Return to medium heat and
continue whisking until the filling boils and becomes very thick, 30 seconds to 1 minute. Off
the heat, whisk in the brown butter and vanilla.

Spread the filling evenly in the tart shell and set aside at room temperature while you
prepare the topping.


Heat the butter just until you see the milk solids turn brown.

Be sure to "temper" the eggs as directed in the recipe, by whisking some of the hot milk mixture into the eggs before combining the entire lot! ...and stir like hell to avoid lumpy custard.

You can fill the crust while the custard is still warm


Make the topping
Using a sharp knife, trim off the peel and pith from the oranges. Halve the oranges
lengthwise and then slice them thinly crosswise and remove any seeds. Arrange the orange
slices on the top of the tart in concentric, slightly overlapping circles.
Stir the marmalade in a small saucepan over medium heat until melted, 30 to 60 seconds.
Strain and then stir in the Cointreau. Brush enough of the mixture on the oranges to give
them a shine (you may not need it all). Refrigerate for 1 hour before serving so the filling
can set up.


Remove as much pith as possible from the oranges and slice the them as thinly as possible (I think mine are a little thick here). I sliced them, then cut each one in half.

Brush with the topping mixture.
(I saved the strained bits for my morning toast, yum)

A pretty cake pedestal for your masterpiece!

A slice of orange and brown-butter tart and a cup of coffee, perfection. Enjoy!

Tuesday, March 20, 2012

Out-Terrium

I got on a roll with the terrarium project and decided to make one for a friend who is currently dealing with health issues. I wanted to create something cheery for her. I choose a cute dog figurine to live in her terrarium, found a container from Mexico...one with the cool air bubbles in the glass, and a very nice dichondra. Well...not so fast. To be kind, let's just say I am not very good at spacial relationships!! The plant was way too big for the container! So I decided to make an "out-terrium" using all the same elements!

I built the "out-terrium" using the same steps as a traditional terrarium. First, rocks for drainage, next, charcoal to keep it sweet, then a layer of sand to break up the solid color of the soil, the plant and then soil around the plant. A willow branch with a found butterfly for fun...AND tucked into the foliage....


...a cute surprise! A little pup on a leather lead :)

So much fun to make, and give!

Sunday, March 18, 2012

Vintage Terrarium and a Mermaid

I have always been fascinated by terrariums...tiny little micro climates, dreamy little landscapes and, something perpetually green (a novelty here in the desert). When I was buying for my gift shop, I was always drawn to dramatic containers, tall glass vessels, bulbous hanging planters and thought I would one day like to use one for a terrarium...but never took one home, darn. No worries! A while ago I found this vintage reptile vivarium. The wooden frame is wonderfully worn and the glass has a few scratches, but I think it adds to the charm. I researched the "how to's"...what a fun project.


I have a special leading lady to inhabit this lush space. I have had this sweet mermaid since I was a girl...so long in fact, she is considered vintage! LOL You can see she has taken some hits and needs a safe place to live!


 The vintage terrarium - an awesome garage sale find...


 A few favorite GREEN plants...


 Nice clean rocks for drainage...


 A layer of charcoal to keep the terrarium smelling sweet...


The combo of rocks, charcoal and soil should be about one third the height of the terrarium...
Remember not to water, just mist...and remove all dead foliage and try to plant away from the glass. Most importantly, no direct sunlight for this type of terrarium.

 Placing the plants...top view...


 ...side view (such as it is! not easy to photograph clear glass)...


 Now the fun part...

 A happy abode for my sweet vintage mermaid and a lot of enjoyment for me!
Almost any vessel can become a terrarium...happy hunting and have a great Sunday!


Wednesday, March 14, 2012

Creamy Crawfish Pasta to the Rescue!

While working long hours in my office this week I could feel my kitchen "creativity meter" drops to zero. I even enlisted Michael's help cooking! Don't get me wrong, he can rustle up a mean quesadilla ...but woman cannot live on tortillas alone! I had to find something else for dinner! So I went scrounging for something easy but satisfying and, of course, delicious when I spotted crawfish in the freezer. I was planning to use it in gumbo, but who has okra at this time of year? I remembered seeing a great recipe using frozen crawfish from "in the kitchn" and here it is! Easy, satisfying and high enough on the yummy rating scale to serve to guests. Mission accomplished! Enjoy!


Creamy Crawfish Pasta
from "in the kitchn"
Serves 6 - 8


1/2 cup (1 stick) unsalted butter
1 green bell pepper, diced small (I used sweet red pepper, it was great)
1 onion, diced small
2 stalks celery, diced small
3 cloves garlic, minced
1/4 cup all-purpose flour
1 heaping teaspoon tomato paste
1/2 cup dry white wine (I used a dry Savignon Blanc AND served it with the meal)
1 pound frozen cooked crawfish tails, thawed
1 cup half and half or heavy cream
1 teaspoon Creole seasoning
Red pepper flakes, to taste
Kosher salt and freshly ground pepper, to taste
16 ounces penne pasta, cooked according to package directions
Chopped parsley, for serving

In a large Dutch oven, melt butter over medium heat. Add the bell peppers, onions, and celery, and sauté until tender, about 7-8 minutes. Add the garlic and cook for an additional minute. Stir in the flour until the vegetables are well-coated and no white clumps remain. Stir in the tomato paste until completely combined.

Increase the heat to medium-high. Add the wine and crawfish to the Dutch oven; let the wine simmer out for a couple of minutes. Pour in the heavy cream. Add the creole seasoning, a generous pinch of red pepper flakes, 1 teaspoon salt, and freshly ground pepper. Cook the sauce at a gentle boil until it is thickened and coats the back of the spoon, about 5 - 10 minutes. Adjust seasoning to taste.


Fold the cooked penne into the crawfish sauce. Stir in a handful of chopped parsley. Serve the crawfish pasta with additional red pepper flakes, hot sauce, freshly grated Parmesan, and slices of toasted garlic bread.


The freshly grated Parmesan is a must, as it adds just enough saltiness. I kept hearing yummy sounds emanating from Michael's side of the room...think he was a tad tired of quesadilla as well...but thanks honey for cooking!!

Sunday, March 11, 2012

Cherry Bomb Chops

What to do with a couple of beautiful double-cut pork chops?...weather too nasty to grill (really, it was snowing outside last night!) So, pan fry or bake? Okay, first I must brine (I always brine pork). For two large chops I use 2 cups of cool water and 2 tablespoons of kosher salt, with a 1/4 teaspoon of red pepper flakes. I place it all in a Ziplock with the chops to brine in the fridge for about an hour. Adjust accordingly for more chops.
My search to find method worthy of these great chops led me to a recipe by Food Network's Guy Fiere, "Cherry Bob Chops". I had some lovely bing cherries in the freezer; locally grown and expertly pitted by my good friend Polly, (feelin' the love girl), and just enough Madiera wine to do the job...yes! It's on!

Cherry Bomb Chops
by Guy Fiere...enough for 4 chops

After you brine the chops, pat them dry, top with a few grinds of pepper, place in a baking dish the recipe says to bake at 200° for 20 minutes OR until the internal temperature reads 90°. This is a BIG "or"...I found I needed the temp at 250° for 20. This warms the chops internally, which keeps them nice and juicy at the finish.
While the chops are in the oven place into a saucepan, 2-15oz cans of tart cherries ( I used about two cups of my fresh/frozen cherries) 3/4 cup of Madiera wine, 1/4 tsp of mined fresh ginger, a large squirt of agave syrup and the grated zest of one orange and a pinch of salt. Bring to a boil then simmer until reduced by half and, in my case, until the cherries are soft.
When the chops reached 90° heat a large skillet with 2 Tbs of grape seed oil or peanut oil. When the oil begins to shimmer cook the chops for 4 minutes on each side, they will have a nice crust, and believe it or not, be cooked perfectly!! Place them on a warm serving plate, tent them to keep warm. De-glaze the sauté pan with another 1/4 cup of Madiera, toss the cherry mixture into the pan, with 1 Tbs of balsamic vinegar, reduce a bit, turn off the heat and toss in 2 Tbs. of unsalted butter to finish the sauce. Serve over your chops and prepare to be wowed!
Guy Fiere has a great video if you'd rather have a visual.

The chops were cooked perfectly but this sauce really is "the bomb". You could use it on so many things...chicken, tofurkey....AND I put this leftover cherry wonderfulness on my breakfast plate this morning! It is worthy of the permanent file!! Enjoy!

Saturday, March 10, 2012

deadline |ˈdedˌlīn|


Origin: 1864 Houghton Mifflin Word Origins

It began as a real line, drawn in the dirt or marked by a fence or rail, restricting prisoners in Civil War camps. They were warned, "If you cross this line, you're dead." To make dead sure this important boundary was not overlooked, guards and prisoners soon were calling it by its own bluntly descriptive name, the dead line. An 1864 congressional report explains the usage in one camp: "A railing around the inside of the stockade, and about twenty feet from it, constitutes the 'dead line,' beyond which the prisoners are not allowed to pass." Nothing could be more emphatic than dead line to designate a limit, so we Americans happily applied the term to other situations with strict boundaries. For example, the storyteller O. Henry wrote in 1909 about crossing "the dead line of good behavior." But it was the newspaper business that made deadline more than just a historical curiosity. To have the latest news and still get a newspaper printed and distributed on time requires strict time limits for those who write it. Yet many are the excuses for writers to go beyond their allotted time: writers' block, writers' perfectionism, or just plain procrastination. (Perhaps the writer is a deadbeat (1863)--another dead word invented by Americans during the Civil War.) Seeking the strongest possible language to counter these temptations, editors set deadlines, with the implication that "Your story is dead--You are dead--if you go beyond this time to finish it."


“Are you aware that rushing toward a goal is a sublimated death wish? It's no coincidence we call them 'deadlines.”
Tom Robbins, Half Asleep in Frog Pajamas 
 
“I love deadlines. I love the whooshing noise they make as they go by.”
Douglas Adams 
 
“Life without deadlines is bliss.”
― Chris Decker  

I'm heading for the bliss....hopefully by tomorrow, end of day...!!!
Hope your weekend is devoid of deadlines!!

Wednesday, March 7, 2012

No Time to Cook, or do anything else...

Intaxication:  Euphoria at getting a refund from the IRS, which lasts until you realize it was your money to start with. 
 ~Author unknown, from a Washington Post word contest
It's income tax time again, Americans:  time to gather up those receipts, get out those tax forms, sharpen up that pencil, and stab yourself in the aorta.  ~Dave Barry


 The nation should have a tax system that looks like someone designed it on purpose.  ~William Simon


Question:  " I understand that Congress is considering a so-called 'flat' tax system.  How would this work?"  Answer:  "If Congress were to pass a 'flat' tax, you'd simply pay a fixed percentage of your income, and you wouldn't have to fill out any complicated forms, and there would be no loopholes for politically connected groups, and normal people would actually understand the tax laws, and giant talking broccoli stalks would come around and mow your lawn for free, because Congress is NOT going to pass a flat tax, you pathetic fool."  ~Dave Barry

'nuf said...sigh

Monday, March 5, 2012

Pflaumenmus-Mandelkrokant Torte

This is the lovely cake my dear friend Heike prepared for her birthday coffee. The base of the torte is a choux pastry, or or pâte à choux, used in making éclairs and cream puffs. The cooled pastry is spread with a homemade plum jam, a layer of whipped cream and then topped with crunchy caramelized almonds. Light and lovely, not overly sweet, the plum mousse or "Plfaumenmus" gives this cake nice creamy fruitiness. Best the day it is made, invite your girlfriends! Enjoy!


Pflaumenmus-Mandelkrokant Torte
(plum jam tart with caramelized almonds)
Recipe in Landlust magazine

Dough:
40 g butter (3 Tbs.)
100 g flour (3/4 cup)
2-3 eggs

Topping:
homemade plum jam (see recipe below)
1 cup whipped cream
40 g butter 50 g sugar (3 Tbs. butter, 1/4 cup sugar)
80 g sliced almonds (1/2 cup)

for the base of the tart bring 170 ml water (2/3 cup) and the butter to a boil, take away from heat source and pour in the flour, stir until it forms one ball, then add one egg and incorporate into the dough, then add the second egg and the third if necessary. Dough will be shiny when done.
Put into a greased and floured 9" "spring form" pan and spread carefully.
Bake in preheated oven at 375 degrees for about 30 min.

In a pan melt the butter and the sugar and caramelize a bit before adding the almonds. Lightly brown them.

Spread the plum jam on the cooled tart base, whip the cream and put it on top and garnish with the caramelized almonds.

Heike's recipe for the "Pflaumenmus":

125g pitted prunes (1 cup)
1/4 cup unsweetened apple juice
a little bit of cinnamon
1/4 tsp lemon peel

Put everything in a blender and puree.
(Actually she doesn't measure, just be careful with adding the liquid so it is not too thin)


Related Posts Plugin for WordPress, Blogger...